Creating your first order
Written By alexprinttools
Last updated Almost 2 years ago
In PrintTools, orders and jobs play distinct roles:
Orders: Created when a customer places an order. They contain details about payments, shipping, customer information, and deadlines.
Jobs: Linked to orders, representing different parts that need to be created. For example, if Jill’s Ice Cream Shop orders business cards for two employees and 500 envelopes, that would be three jobs under one order.
Creating an Order
Navigate to Orders:
On the left-hand side, click the Orders tab.
Choose to create an Open Order or an Estimate. An estimate is used when a customer is awaiting cost details before proceeding.
New Order/Estimate:
Click New Order or New Estimate in the top right corner. For this example, we’ll select New Order.
An order is now created. While it cannot be deleted, it can be modified or closed if not needed.
Order Page:
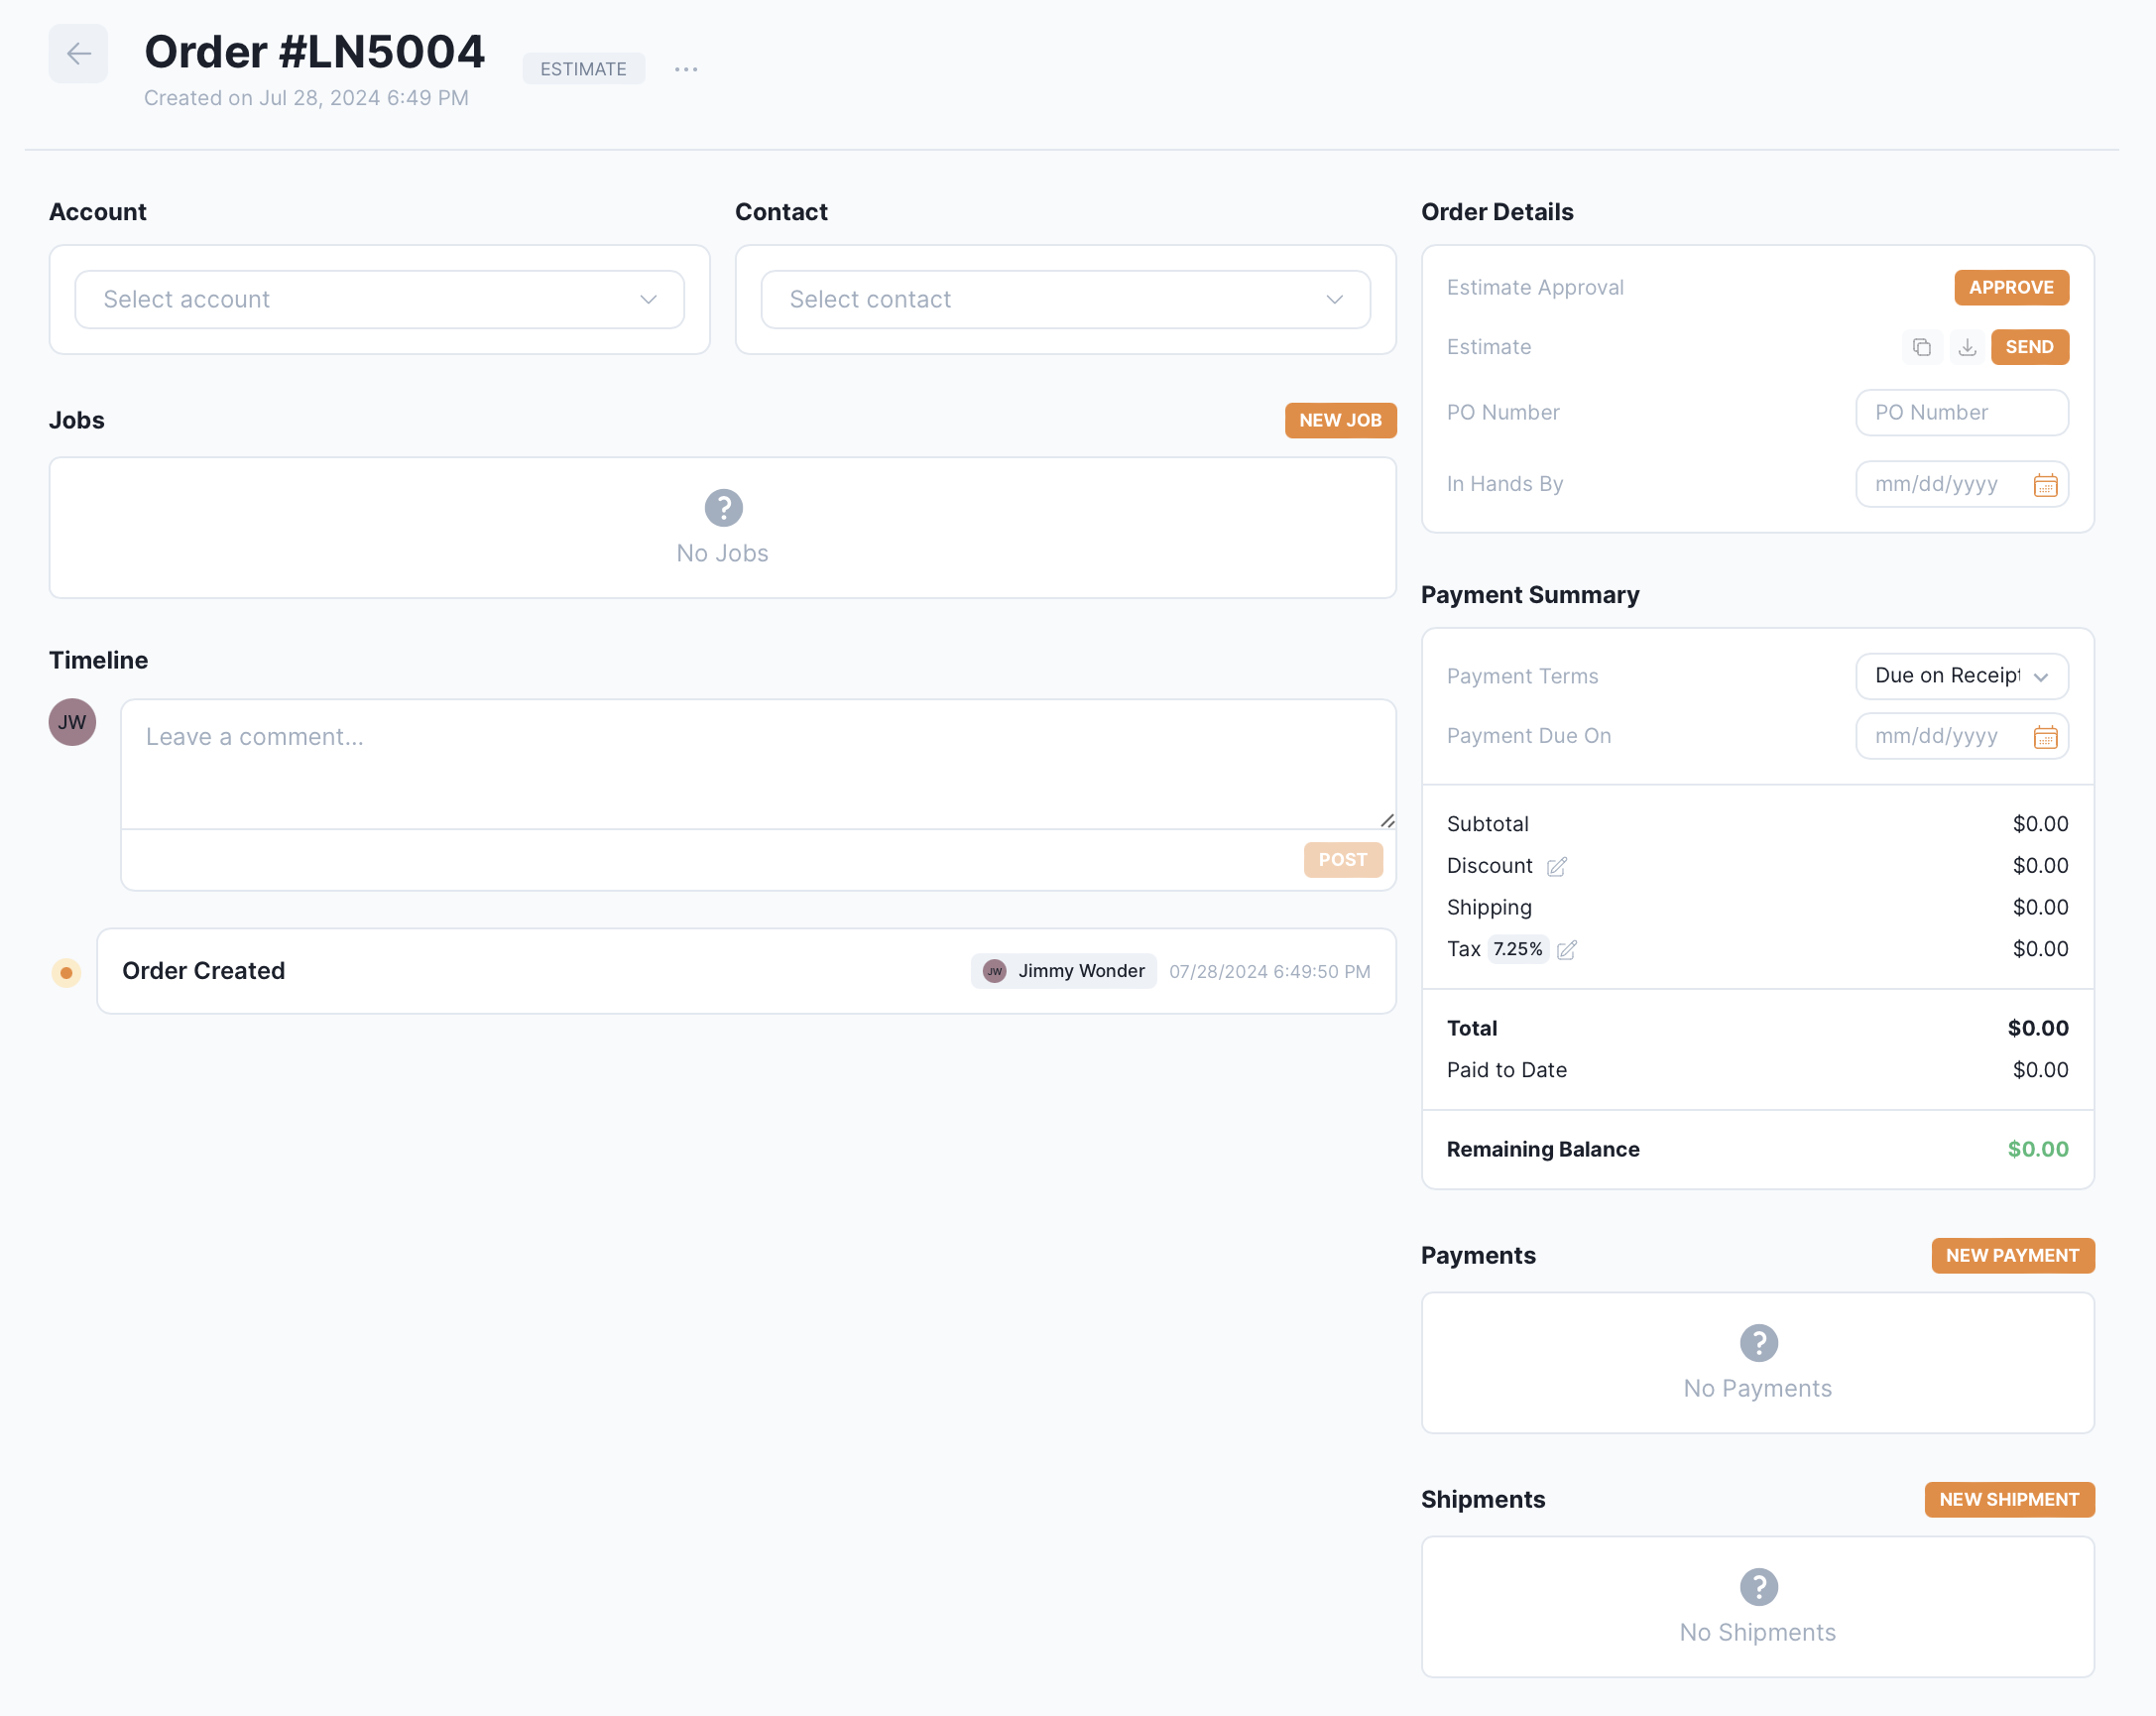
Select an existing customer account and contact. You can also add new accounts or contacts here if the customer doesn’t already exist. If the account exists, but not the contact, you can add a contact but still use the existing account.
On the right side of the page, you'll find sections for Details, Payment Summary, and Shipping. This is where you can download or send completed invoices once the order is finished.
Invoiced On: The date the invoice was billed.
PO Number: Optional field if required by your customer.
In Hands Date: The date the customer needs the project by. This sets the completion date for all jobs in the workflow.
Payment Summary:
Select payment terms and manually set a due date if needed.
To process a payment, click New Payment. This will open the Payment Modal where you can choose a payment option.
Timeline: Shows all modifications made to the order and allows you to leave comments for coworkers.
For more details on creating a job, refer to the "Creating Your First Job" document.