Adding Paper Inventory
Written By alexprinttools
Last updated Almost 2 years ago
Overview
Managing your paper inventory in PrintTools ensures that you always have the necessary materials on hand for your print jobs. Follow these steps to add new paper inventory to your system.
Steps to Add Paper Inventory
1. Navigate to Inventory
Use the navigation menu on the left side and click on “Inventory.”
2. Click "Add New" Button
In the top right corner, click the “Add New” button.
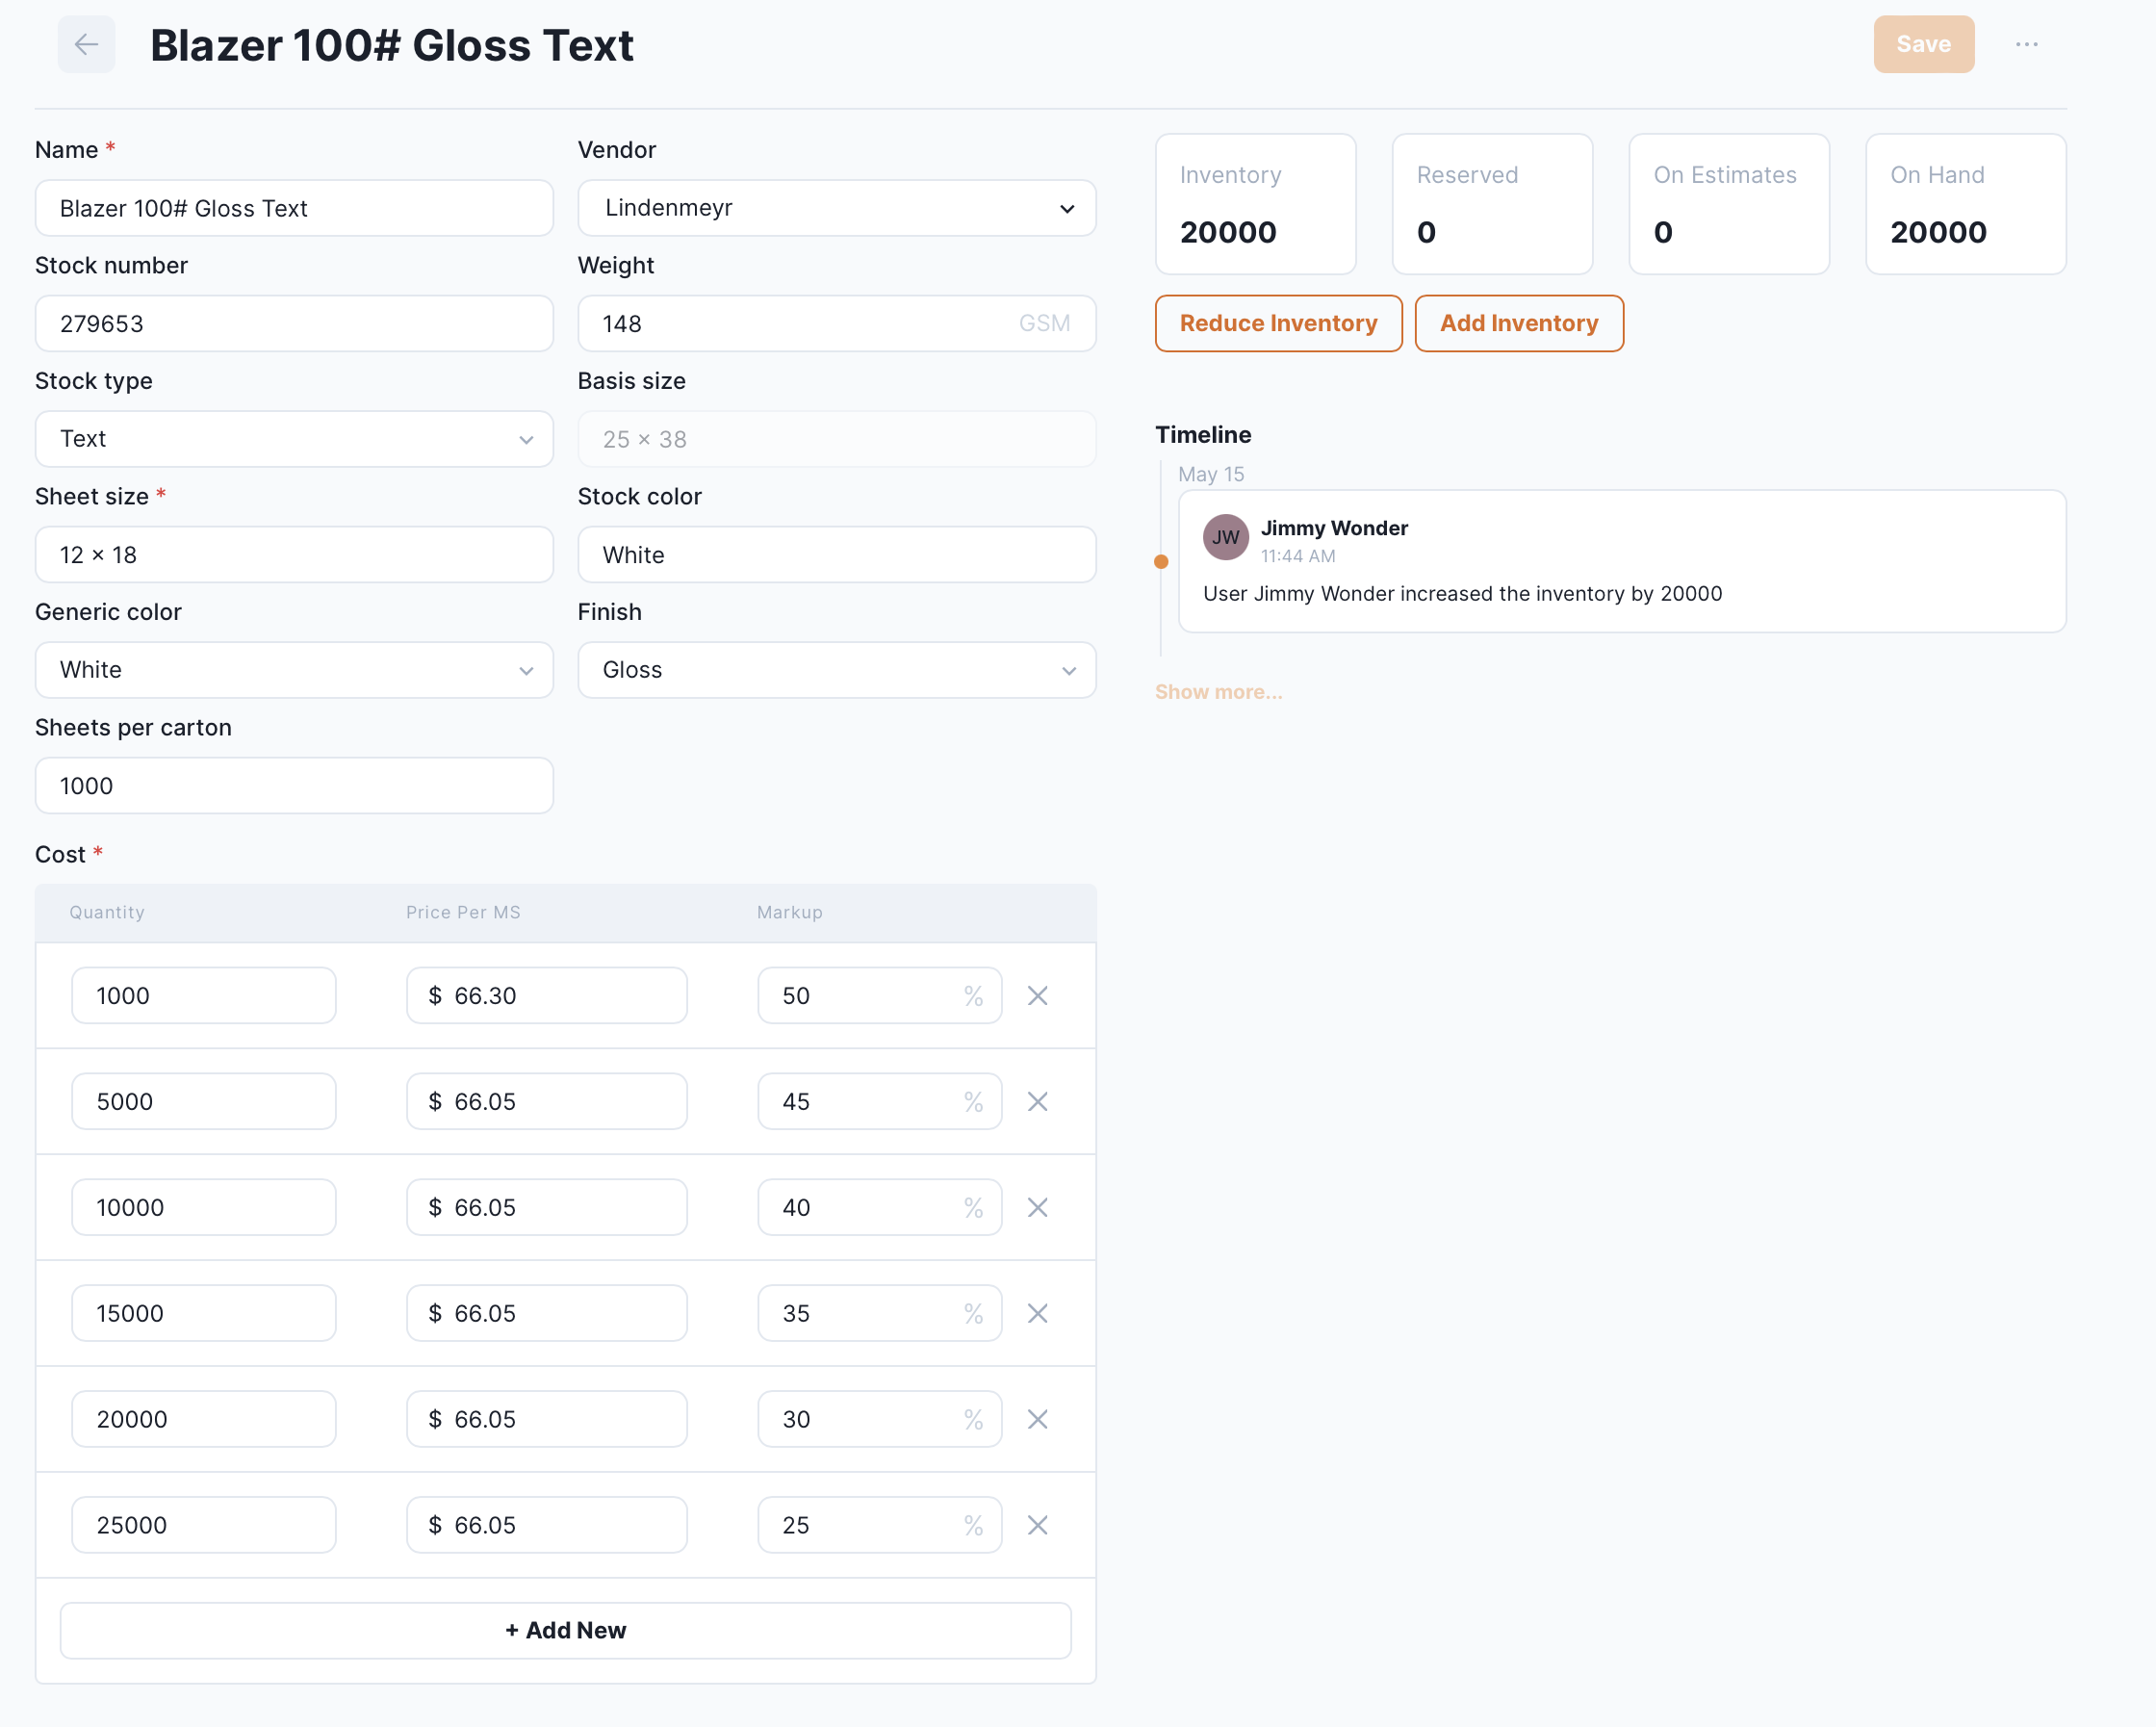
3. Fill in Paper Details
Fill in the following fields with the relevant information:
Paper Name: Enter the name you use for the paper in your shop. Include details such as size if you prefer, as this will appear when selecting paper.
Vendor: Select the vendor you purchase the paper from. You can add new vendors on this page.
Stock Number: Enter the vendor's stock number to make reordering easier.
Weight: Enter the GSM weight of the paper, which you can find from your paper supplier.
Stock Type: Choose the stock type, which dictates the basis size of the sheet.
Sheet Size: Enter the size you stock the paper in, as provided by the vendor.
Stock Color: Enter the specific name of the color, useful for reordering.
Generic Color: Enter the common name of the color that most people would use.
Finish: Select the type of paper finish.
Sheets per Carton: Enter the number of sheets per carton.
4. Enter Pricing Information
Fill in the following fields with the relevant pricing details:
Quantity: Enter the quantity for the pricing tier.
Cost per MS: Enter the price you pay for 1000 sheets of the paper.
Markup: Enter your percentage markup.
You can add more rows and adjust the quantities as needed. Defaults are provided to assist you.
Sample Entry
Summary
By following these steps, you can efficiently manage your paper inventory in PrintTools, ensuring that your print shop runs smoothly with accurate stock levels and easy reordering processes.